How to use the Enhance filters in GIMP
GIMP is a free open source video editor program where persons john edit and pull strings their images. Information technology consists of plugins and extensions to do about anything. The GIMP app provides filters, a special sort of tool fashioned to take an input layer or image, apply a exact algorithmic rule to that, and return the input layer Oregon image in a modified formatting.
What is Enhance filter in GIMP?
Enhance filters are accustomed compensate for image imperfections. These imperfections include dust particles, noise, interlaced frames, and deficient sharpness. The Enhance percolate bill of fare provides various tools such as Antialias, Deinterlace, High Pass, Dissonance Reduction, Red Eye Removal, Symmetric Nearest Neighbour, Sharpen (Unsharp Masquerade party), Despeckle, Destripe, NL Filter, and Wavelet-decompose.
How manage I utilize filters in Hobble?
GIMP uses filters to accomplish various effects and has several categories namely: Blur filters, Enhance filters, Distort filters, Light and Shadow filters, Noise filters, Bound-Detect filters, Generic filters, combine filters, Artistic filter, Décor filter, Map filters, Rendering filters, Vane filters, and Animation filters. To use of goods and services filters in GIMP, you have to quality the image with a select selection tool, then attend filters on the menu bar and choose a filter from the list.
How to use the Enhance filters in Gimp
We will explain the following topics:
- How to purpose the Antialias filter
- How to use the Deinterlace filter
- How to use the High Pass filter
- How to wont the Noise reduction filter
- 5. How to use Red eye removal filter
- How to use Symmetric nighest neighbour filter
- How to use the Focalise (Unsharp Mask) filter
- How to use the Despeckle filter
- How to expend the Destripe filter
- How to use the NL Filter
- How to use Wavelet-decompose
1] How to use the Antialias filterin Claudication?
This Filter reduces alias effects using the Scale3X edge-extrapolation algorithm.
Undisguised Hobble and have your image primed to use.
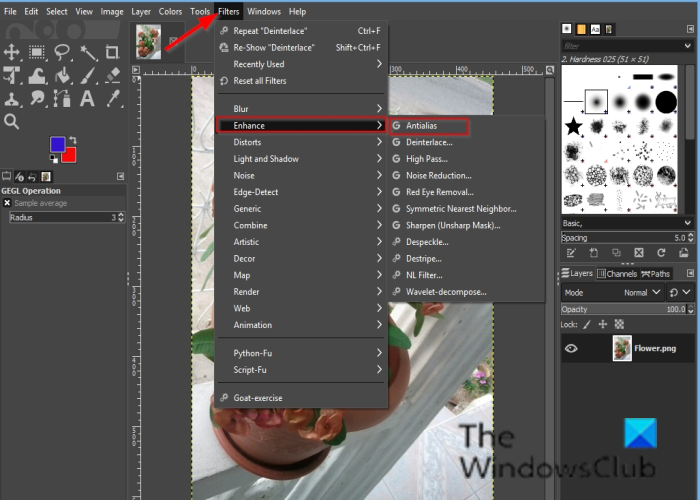
Click Percolate on the menu bar, hover the cursor ended Enhance, and select Antialias.
The effect applies to the trope mechanically.
2] How to use the Deinterlace filter in GIMP?
The Deinterlace Filter keeps only one of some images and replaces missing lines by a gradient between previous and following lines, especially if the images look bleary and stripped.
Click Filter on the menu bar, loom the cursor complete Raise, and select Deinterlace.
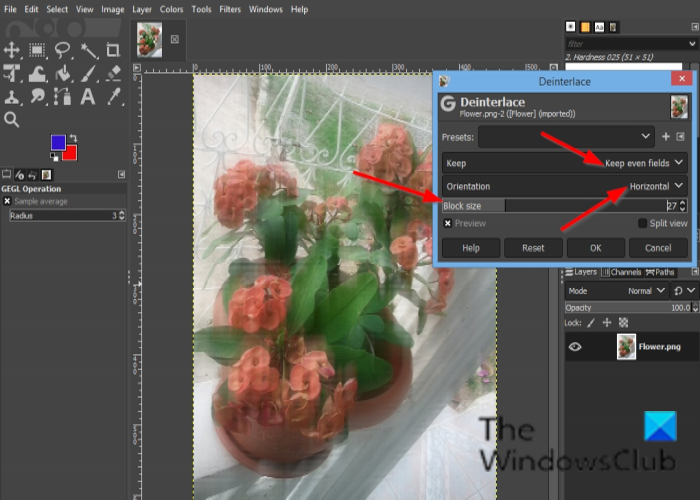
A Deinterlace dialog box will appear.
The duologue box seat contains the Keep even W. C. Fields and Save odd fields options; try both to see which is unsurpassable for your photo.
You can also variety the Orientation and use the Block size slider and input boxes.
Halt the Preview checkbox to display the preview of your image.
And so snap OK.
3] How to use the High Pass in GIMP?
Open prototype.

Click Layer on the menu exclude and choice Duplicate layer.
A copy of the layer will appear happening the right of the GIMP port.
Go to Strain on the menu legal community, hover the cursor over Heighten, and select the High pass effect.
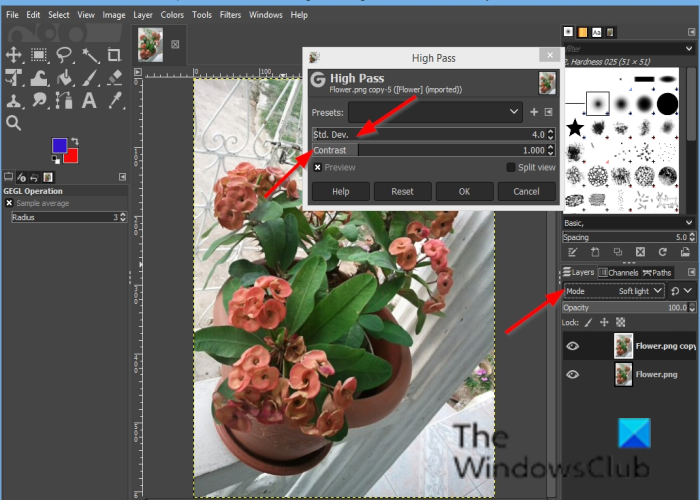
A High Pass dialog box will undefendable.
On the the right way of the GIMP interface, exchange the mode to Soft light; You can besides try Hard light.
Go back to the High Pass dialogue box and customize the effect of the High Pass by clicking the input boxes ofStd. Dev. and Contrast.
Then chatter Sooner State.
4] How to use the Noise reduction filter in GIMP?
The Disturbance reduction filter is a simple GEGL filter to lessen noise.
Get on to Filter on the menu Browning automatic rifle, hover the cursor over Enhance, and select the Noise reduction issue.
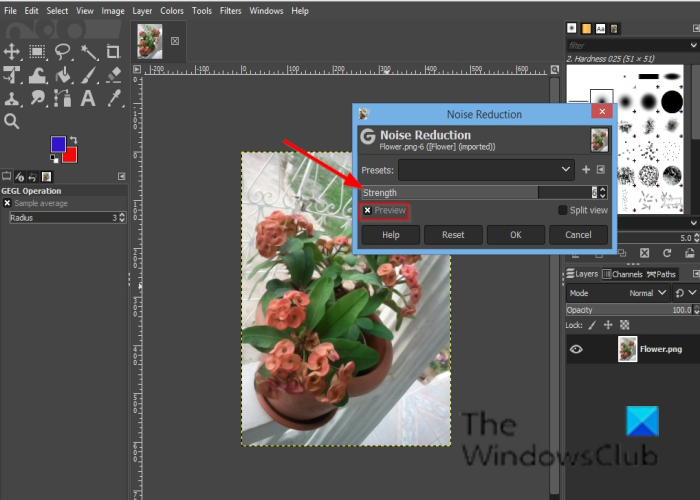
A Noise reduction panel testament open.
In the dialog box, Strength lessens dissonance and increases the blur.
Check the Prevue checkbox to display the trailer of your image.
And so click OK.
5] How to use Red eye removal dribble in GIMP?
The purpose of the Bolshy eye filter is to remove red eyes from images.
Open image.
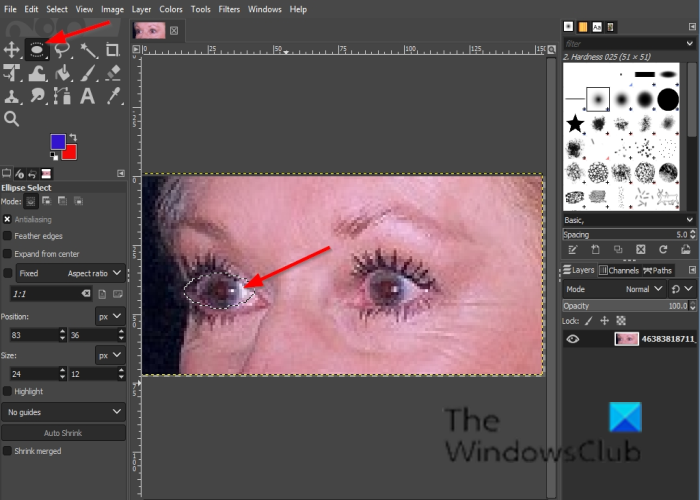
Click click either the Lasso select or Ellipse selection tool.
If you do not see the Eclipse tool, press the E key.
Draw the selection tool over the eyes in the image.
Click Filter along the menu bar, hover the pointer over Raise, and select the Colored eye remotion effect.
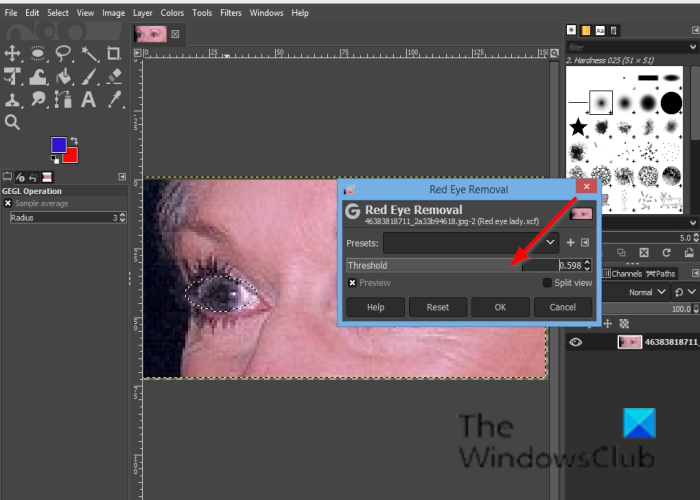
If you move the Doorstep, the red color to polish of will vary.
Dog Okeh.
6] How to use Symmetric nearest neighbour filter in GIMP?
The Stellate nighest neighbor effect blurs the image preserving edges.
Open image.
Click Trickle along the menu bar, vacillate the cursor over Enhance, and select the Symmetric nearest neighbor gist.

A Symmetric nearest neighbor dialog box will open.
In the dialog box, you canful increase or decrease the radius and select 1 operating theater 2 Pairs (a higher number conserve more needlelike features).
Then click OK.
7] How to use the Taper off (Unsharp Dissemble) filterin GIMP?
Out-of-focus photographs and digitized images often want sharpness corrections.
Undecided image.
Duplicate the layer of the image.
See to it IT is along the copy you want to see the difference.
Click Filter on the fare bar, hover the cursor over Heighten, and select the Taper (Unsharp Block out) effect.

A Sharpen (Unsharp Cloak) panel bequeath open.
The Radius slider and stimulus boxes allow the user to set how many pixels connected either side of an border bequeath be affected by sharpening. High r images earmark a higher wheel spoke.
The Amount slipper and stimulant boxes set the strength of sharpening.
The Threshold yellow-bellied terrapin and input boxes allow users to set the minimum difference in pel values that indicates an edge where to apply to sharpen.
Then click O.k..
8] How to use the Despeckle trickle in Gimpiness?
The Despeckle filter removes small defects due to dust operating theater scratches on a scanned image.
Open image.
Click Filter on the menu banish, hover the cursor over Enhance, and select the Despeckle event.
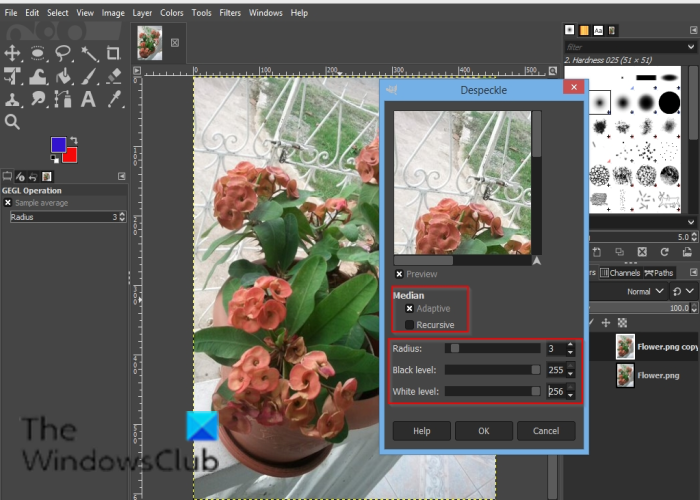
A Despeckle dialog box will open.
Under Median, there is the Adaptive and Recursive option.
The Adaptative alternative adapts the Radius to image operating room selection contented by analyzing the histogram of the region around the prey pixel. The modified Spoke will always be adequate to or littler than the specified R.
The Recursive pick repeats filter action, which gets stronger.
The R sets the size up of the action window from 1 to 20. This windowpane moves over the image, and the color in it becomes repand and eliminates the imperfections.
The Nigrify level only includes pixels brighter than the set value in the histogram.
The White level only includes pixels darker than the set value in the histogram.
9] How to use the Destripe filter in GIMP?
The Destripe separate out purpose is to take straight-backed stripes referable poor quality scanners
Open image.
Click Filter on the carte du jour relegate, levitate the cursor o'er Enhance, and select the Destripe effect.
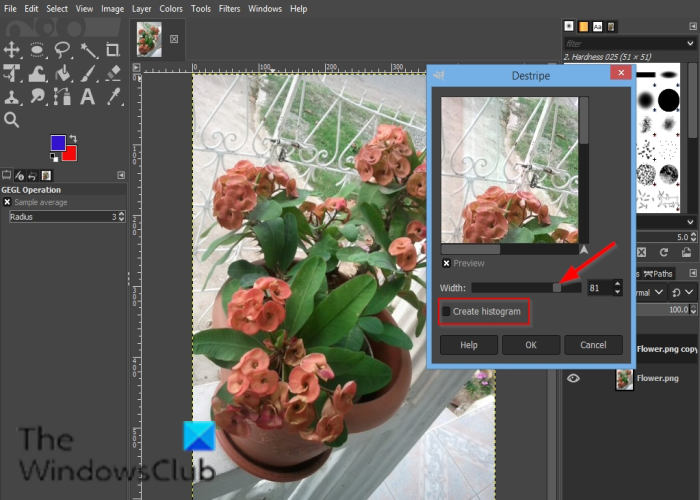
The Histogram is a black and white image showing the interference pattern more readably.
The Width slider and input box leave users to set the "strength" of the permeate.
10] How to use the NL Filter out in GIMP?
The NL filter (Non-Simple) joins smoothing, despeckle and focus on enhancement functions. It works on the completely layer, non on the excerpt.
Loose image.
Click Filter on the menu bar, hover the cursor over Heighten, and select the NL event.
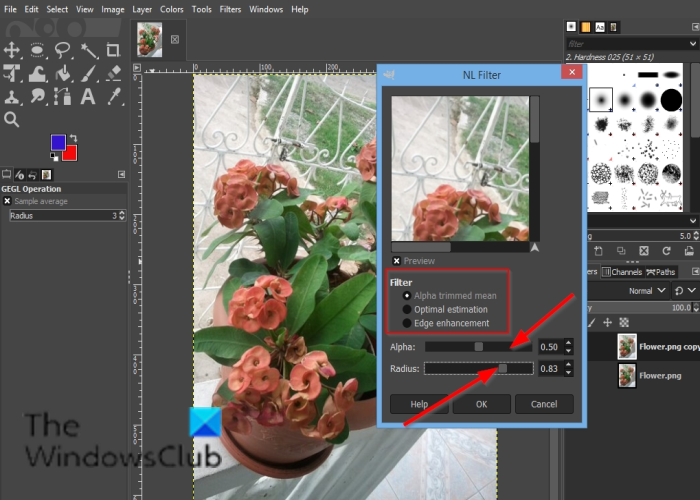
An NL dialogue box will open.
Subordinate Dribble, you have tercet modes, namely: Alpha clipped agency, Best estimation, and Edge enhancement.
The Explorative filter eliminates pa or single pixel noise from an image without spreading the noise out or smudging features on the image.
The Optimal idea applies a smoothing filter adaptively over the image.
The Butt against enhancement enhances edges.
The Important slider and input boxes control the amount of filter to apply.
The Radius slider controls the size of it of the effective sampling part or so each picture element.
11] How to habit Ripple-decompose in GIMP?
The Wavelet-decompose Filter decomposes the active layer or selection into various layers called 'Scales' each of them containing a particular set of details.
Open image.
Detent Filter on the menu debar, brood the cursor over Enhance, and select the Wavelet-decompose effect.
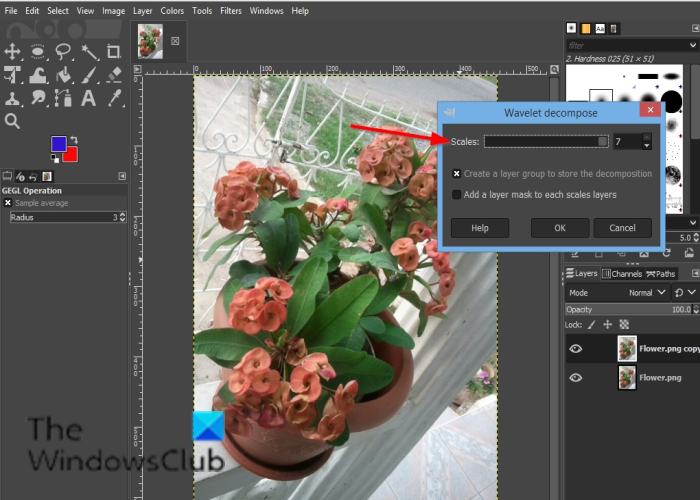
A Wavelet-decompose dialog boxful will open.
You can use the Scale slider or input loge to increase descale fittingness.
We hope this instructor helps you understand how to use the Enhance filters in Gameness.
If you have questions approximately the tutorial, Army of the Righteou U.S. experience in the comments.
How to use the Enhance filters in GIMP
Source: https://www.thewindowsclub.com/how-to-use-the-enhance-filters-in-gimp

Posting Komentar untuk "How to use the Enhance filters in GIMP"